This KodakGallery.com review is only for the basic 5x7 books called Small Autofill Paperback.
For 4 years I've given KodakGallery.com Photo Books as Holiday gifts.
Every family member has raved about them and ask each year to make sure I keep sending them.
I like the print quality. In the past they weren't as glossy but THIS YEAR they look extra amazing and with a good gloss. I ran out of room for thick photo albums long ago. These take very little room and let me keep track of which year a group of photos were taken. Since most of my family uses the Kodak site, we can easily share and print all family photos.
The Kodak Gallery online site recently changed (Fall 2009). I hate changes like this usually, since I am always too busy learning new things at work to deal with learning new things for my own rare time off.
But these changes make me really happy. I am a graphic artist and website programmer so I have more experience at sites like this, but also have little patience. Please take that into consideration for this review.
The price is right too. Without a promo code my book this year for 30 photos is $16.66. They have great Kodak Gallery promo codes each year too. That's a nice price for something priceless for my family members.
Small Autofill Paperback.
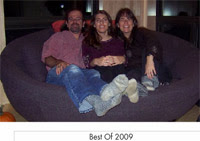
This style of photobook doesn't allow for captions. There is a front cover that lets you type something like "Best of 2009." And a small photo can be added to the back cover to make it look even more professional.
EASY STEPS
1) www.kodakgallery.com
2) Click Join or Sign In
3) Click "Photo Books" on the top right menu (The choices are Photo Sharing| Prints | Photo Cards | Photo Books)
4) Click "Shop Photo Books"
--> I like the LARGE obvious photo links when you start the actual Photo Book Process
5) Click "Small AutoFill Paperback"
6) Click on a black or white Cover design box (this sets the COVER)
7) Click "Select Page Designs" (this sets the PAGES)
--> The other more expensive books have many more choices than black or white
8) Click "Get Started" button on the right
Your uploaded photos will show on the top of the book form.
If new to the site, click the top right button called "Upload Photos"'
DRAG AND DROP
The ability to drag and drop the photos on your choice of page is really fun to use.
The Adobe Flash player system is exactly right. (For Once!)
It lets you see the flipping of the pages so you can see the book take shape.
You can rotate the photos, zoom and shift the photos for each page. LOVE THAT!
All photos must fill the entire page for this particular book. (the other book choices will give you other options)
Easy to delete and add new pages.
"Save" button is handy on the top right also.
Click "Add to Cart" when you're done.
You can save the book and come back to it later.
That's a great feature. It was so easy to put together, however, that the project was done quickly on my first attempt.
With the previous system it would take at least 3 sessions and that's when I had memorized the steps.
My only wish would be a gift box. Last year I sent an 8x10 print in a frame for a birthday gift and the recipient was incredibly pleased and certainly the absence of a gift box didn't matter that much. But if they ever offer, I'd pay for that.
Note: 12/14/09 -- just got our 2009 books and we both said WOW when they came out of the mailer! My folks are going to love it!
Rating: 10

No comments:
Post a Comment